2023 | Buch

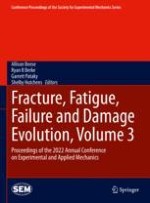
Fracture, Fatigue, Failure and Damage Evolution, Volume 3

Proceedings of the 2022 Annual Conference on Experimental and Applied Mechanics

insite
SUCHEN

Über dieses Buch

Fracture, Fatigue, Failure and Damage Evolution, Volume 3 of the Proceedings of the 2022 SEM Annual Conference & Exposition on Experimental and Applied Mechanics, the third volume of six from the Conference, brings together contributions to this important area of research and engineering.

The collection presents early findings and case studies on a wide range of areas, including:

Novel Experimental Methods

Extreme Environments

Interfacial Fracture

Integration of Models & Experiments

Mechanics of Energy & Energetic Materials

Integration of Models & Experiments

In Situ Techniques for Fatigue & Fracture

Microscale & Microstructural Effects on Mechanical Behavior

Inhaltsverzeichnis

Frontmatter
Chapter 1. Size Effect Analysis and Characterization of Quasibrittle Fracture of Sandstone Rocks
Abstract
Sandstone rocks exhibit quasibrittle fracturing and deviate from linear elastic fracture mechanics (LEFM) at typical laboratory scales. The quasibrittleness is caused by the formation of a finite-sized fracture process zone (FPZ) during failure. This leads to a marked specimen size effect in the strength and fracture toughness of typical laboratory-scale specimens. So, to properly apply the laboratory-measured fracture properties of sandstone rocks to field scales, understanding and characterizing this size effect is essential. This work is aimed at such a characterization and analysis for two different Berea sandstone rocks (Birmingham buff and Amherst gray). This is done by conducting mode I fracture tests on geometrically scaled, single-edge notched bend (SENB) specimens of different sizes for both sandstones. A marked size effect in the nominal strength, as well as the LEFM fracture toughness, is observed. Subsequently, data analysis is conducted by invoking the type II Bazant size effect law on the nominal strengths, which allows a systematic extrapolation of lab measurements to much larger sizes where the FPZ size becomes negligible (making LEFM applicable). The size effect law-based analysis is used to estimate the size of the FPZ allowing the characterization of the degree of quasibrittleness of a given specimen size. Further, the analysis allows the determination of their true, size-independent fracture toughness. The two sandstones are found to considerably differ in their degree of quasibrittleness. Overall, the size effect method is found to work well for the characterization of fracture properties of both sandstones, and for their extrapolation from laboratory to field scales.
Peter Davis, Ephraim Bryski, Kedar Kirane
Chapter 2. Fracture Response of Additively Manufactured Aluminum Alloys: Effects of Loading Rate and Build Orientation
Abstract
Aluminum alloys are the go-to alloys for numerous lightweight applications in automotive and aerospace industries. Excellent specific stiffness, specific strength, resistance to corrosion, and good machinability are some of the characteristics which make them highly desirable to these industries. The potential for aluminum alloys to be used in safety critical applications have expanded over the last few years because of the introduction of additive manufacturing (AM). AM, however, introduces uncertainties into the material which could affect the mechanical properties of parts in general and fracture properties in particular relative to conventionally produced ones. In this work, a popular AM aluminum alloy, AlSi10Mg, and a new AM aluminum alloy, AlF357, were fabricated using Laser Beam Powder Bed Fusion (LB-PBF) approach to evaluate quasi-static and dynamic fracture responses. Four build orientations – horizontal, vertical, flat, and diagonal – were assessed. An Instron mechanical tester and a Kolsky bar apparatus were used separately to carry out quasi-static and dynamic loading experiments, respectively, on notched samples. The local in-plane surface displacements near the crack tip were measured using Digital Image Correlation (DIC) to evaluate the fracture parameters directly. A hybrid experimental-numerical approach that combines DIC measurements and finite element analysis was implemented to extract critical energy release rate and crack growth resistance behaviors. The performance of the two alloys at two disparate strain rates is compared. The effect of the build orientation in these two aluminum alloys is also studied and the respective fracture properties are quantified.
John P. Isaac, Seungjong Lee, Nima Shamsaei, Hareesh V. Tippur
Chapter 3. Open Hole Fatigue Testing of CNT Infused GFRP Multi-scale Composite Laminates Using Infrared Thermography
Abstract
Cutout or holes are unavoidable features in composite structures for structural assembly and functionality that often result in regions of fatigue damage initiation. To enhance the fatigue life of the unidirectional glass fiber reinforced plastic (UD-GFRP) laminates around cutouts, multi-walled carbon nanotubes (MW-CNTs) were locally aligned at the periphery of the cutouts via a nonuniform electric field-based dielectrophoresis technique. Previous investigation on open hole tensile strength indicates that orienting CNTs perpendicular to the loading direction (and fiber direction) effectuated maximum increase in the open hole tensile strength. In the current work, fatigue characterization of locally aligned MW-CNT infused UD-GFRP multi-scale composite laminates was investigated. A novel infrared thermography (IRT)-based technique has been employed to characterize open hole fatigue (OHF) behavior of these locally aligned MW-CNT infused UD-GFRP multi-scale composite laminates. Traditional SN curve techniques tend to be time-intensive; therefore, IRT has been adopted to determine the fatigue life of CNT infused GFRP composites.
Suhasini Gururaja, Nithinkumar Manoharan, Jayaram Pothnis, Anil Chandra
Chapter 4. Effects of Work Hardening on 314 Stainless Steel Alloy
Abstract
314 stainless steel (314 SS) is an austenitic alloy of stainless steel which adheres to the linear-elastic model of material behavior. It is used in high-temperature environments, as well as several ballistic and aerospace applications. When 314 stainless steel is deformed past its elastic limit, its molecular structure is stressed in a way that strengthens the areas of the steel local to the deformed material. This process is called “work hardening,” or “cold working.” As materials are cold worked, properties such as ultimate tensile strength, yield stress, and hardness will change proportional to the degree of cold working. For the design of ballistics and aerospace structures, a working knowledge of these fundamental properties for 314 SS is vital. Despite this need little work has been reported on the material properties of work hardened 314 stainless steel in literature. The research conducted herein aims to characterize the behavior of 314 SS tubing which has been work hardened to various degrees.
The stainless steel tubing chosen was of a 3/8 inch outer diameter and 1/8 inch outer diameter. This small diameter geometry was the best replication of the aforementioned application of this material in the aerospace industry. To work harden the tubing, the tubes were bent at 5° intervals, ranging from 5 to 15°, and then bent back to their original position. Some samples were further work hardened by repeated bending to the same degree interval. The effects of the cold work on the material properties were quantified using a tensile test, a microhardness test, and resonant ultrasound spectroscopy. The results of the experiment showed that the yield strength of the part increases with small angle bends such as 5 degrees and further increases with repeated bending. Bending beyond this 5° point appeared to produce a negative effect on the yield strength of the part. The change in yield strength between any set of trials was typically around 1–2%. The ultimate strength consistently decreased with increased work hardening, approaching 2–3% decreases with greater amounts of work hardening. The change due to repeated bending was on average less than 1%. The analysis of the failure strength was inconclusive, with the failure strength varying by as much as 19% from the control. It is likely that more trials would reveal a clear pattern, indicating what effect the work hardening has, if any, on the failure strength.
William Norton, William Connor McNellis, Chris Mysliwiec, Chandler Benjamin
Chapter 5. Gap Test Consequences for Fracture Mechanics of Quasibrittle Materials and Plastic-Hardening Metals
Abstract
In a new type of fracture experimental setup, which was developed in 2020 and usually referred to as gap test, we use the size effect method to identify the interaction between crack-parallel compressive stresses σxx, σzz, and σxz on the material primary fracture energy Gf and on the characteristic size of the fracture process zone (FPZ) cf. For quasibrittle materials, previous tests showed that σxx could either enhance or reduce Gf to almost zero. In this paper, we adapt the gap tests to study the effect of σxx on fracture of plastic-hardening metals. First, the scaling law of structural strength for this type of material is re-examined and found to be different, showing a transition from the micrometer-scale FPZ through millimeter-scale yielding zone (YZ) to small-scale yielding fracture of large structures. This transition has been formulated by means of asymptotic matching approximations. Next, the gap tests are performed on aluminum alloy using scaled notched three-point-bend beams of depths D = 12–96 mm at three different levels of σxx. Our findings reveal that a crack-parallel stress σxx = 40% of the yield strength will roughly double the fracture energy and triple the size of the YZ.
Hoang Thai Nguyen, Ahmet Abdullah Dönmez, Zdeněk P. Bažant
Chapter 6. Testing and Calibration of an In-house Built Fatigue Testing Machine
Abstract
Our college owns a modified fatigue testing machine, designed and built by our own Advanced Mechanics and Design students as their final project. For the machine to be functional for teaching and research, it needs to be tested using different materials, and results need to be verified and validated, and finally the machine needs to be calibrated according to relevant standards. Accordingly, the objective of this project was to verify, validate, and calibrate this machine that will potentially be used for teaching and research. Preliminary data has been collected for steel and aluminum, and the pattern of results (fatigue strength vs. cycles or S-N curve) confirms the true fatigue behaviors of steel and aluminum and agrees with published data. Nevertheless, the observed fatigue property values do not exactly match with published values of the tested materials. Further tests and adjustments of the machine are needed to get accurate results in terms of fatigue properties of different materials with already published results. Surfaces of failed specimens will also be evaluated using scanning electron microscope (SEM) and the pattern of failure will be investigated. After calibration, the research and experimentation activities that will be conducted using this machine will lead into better understanding of the fatigue behaviors of existing and new materials that will be developed at our institution. It will also be used as an excellent teaching tool for Materials Science, Mechanics of Materials, Steel Design, and Advanced Mechanics and Design classes.
Fisseha M. Alemayehu, Andrew Alarcon, Fernando Ibanez, Kenneth Leitch, Sanjoy Bhattacharia
Chapter 7. Fatigue Testing of Additively Manufactured 17-4PH Stainless Steel Samples with a Stress Concentration
Abstract
In this paper, additively manufactured (AM) 17-4 precipitation-hardened (PH) stainless steel (SS) samples were assessed in quasi-static tension and tension-tension fatigue tests. Samples in this study were produced using a Markforged Metal X AM printer, which utilizes the Atomic Diffusion Additive Manufacturing (ADAM) process. Samples were washed and sintered according to the Markforged specifications that are noted to be typical of 17-4 PH SS. Quasi-static and load-controlled fatigue tests were conducted on a subsize dog bone geometry per ASTM E8 where samples had a circular stress concentration in the form of a hole at the center of the sample width. Data was collected across a fatigue range of 1 to 3e5 cycles with data presented in the form of time, displacement, load, and strain data over those lifetimes.
Michael D. Coatney, Bradley D. Lawrence, Todd C. Henry, Latha Nataraj, Clifford Hubbard
Chapter 8. Mixed-Mode Fracture Interactions Along Centrally Cracked Weakened Planes
Abstract
Mixed-mode fracture interactions contribute to many industrial applications, particularly in oil and natural gas extraction across shale regions. However, shale is a layered material that complicates the interactions of the mixed-mode fracture to respond as a weakened plane mixed-mode fracture. Furthermore, the nature of mixed-mode fracture along weakened planes is not fully understood. This study focuses on the investigation of mixed-mode fracture along weakened planes subjected to compressive stress wave loading. Specimens are prepared using rectangular polycarbonate plates through cut at 45° angles and glued back together using a polymeric adhesive. A central gap is left to create a starter pre-crack along this weakened plane. The specimens are dynamically loaded in a split-Hopkinson pressure bar (SHPB), and the full-field strains are monitored using Digital Image Correlation (DIC). The mixed-mode stress intensity factor is determined using far-field applied loads from the SHPB measurements and the crack tip opening displacements from DIC.
Kyle R. Messer, Achyuth Thumbalam Guthai, Ali F. Fahem, Raman P. Singh
Chapter 9. Use of Full-Field Strain Measurements to Determine Mechanical Properties of Shale Under Repeated Cyclic Loading
Abstract
Stimulation of unconventional hydrocarbon reservoirs in the form of shale deposits through hydraulic fracturing is a considerable resource to produce oil and gas. Consequently, it is important to understand the properties of shale, especially when subjected to repeated cyclic loading. This is because during drilling and hydraulic fracturing construction, surrounding rocks are exposed to cyclic stresses which encompass micro cracks, and their behavior affects mechanical response and failure, which in turn influence the hydraulic fracture process. In this study, Woodford shale materials obtained from Anadarko basin in Oklahoma are tested to determine the mechanical properties, post-failure behavior, and the failure strength of shale. These properties are quantified under cyclic loading conditions using full-field strain measurements from digital image correlation (DIC) in conjunction with analytical expressions of the stress fields. Tests are carried out by loading perpendicular to the bedding planes. It is found that shale materials display significant anisotropy in material response and are also influenced by tensile or compressive loading conditions. This has important implication on the use of shale properties to predict hydraulic fracturing parameters that will lead to optimum yield.
Achyuth Thumbalam Guthai, Ali F. Fahem, Raman P. Singh
Chapter 10. Fatigue Lifetime Reinforcement of Natural Rubber: Loading Multiaxiality Effects at Ambient Temperature
Abstract
Carbon black-filled natural rubber is the most commonly used elastomer for anti-vibratory applications. For decades, uniaxial fatigue tests were carried out to construct models for fatigue lifetime prediction. It is now well established that NR exhibits a lifetime reinforcement when subjected to non-relaxing loadings (Cadwell, Rubber Chem Technol 13:304–315, 1940; Ruellan et al, Int. J. Fatigue 124: 544–557, 2019). This reinforcement observed for uniaxial fatigue is classically attributed to strain-induced crystallization, even though this has never been demonstrated. In the late 2000s, special interest was dedicated to multiaxial fatigue of elastomers to enrich the existing models (André, Critère local d’amorçage de fissure en fatigue dans un élastomère de type NR, 1998; Saintier, Fatigue multiaxiale dans un élastomère de type NR chargé : mécanismes d’endommagement et critère local d’amorçage de fissure, 2001). Nevertheless, the effect of non-relaxing loading conditions on the multiaxial fatigue life has not been addressed and is still an opened question. In the present study, both uniaxial and multiaxial fatigue tests have been carried out with an axisymmetric specimen geometry to investigate the effect of non-relaxing loading conditions on the fatigue life reinforcement. It was shown that a lifetime reinforcement is observed in the case of pure torsion, similarly to the case of uniaxial tension (Ruellan et al, Int. J. Fatigue 124: 544–557, 2019). Post-mortem analysis of the fracture surface has been performed to better understand the effect of SIC on the damage mechanisms, especially through the observation of fatigue striations. This work provides new experimental results to enrich and benchmark existing fatigue lifetime prediction models.
Y. Mouslih, B. Ruellan, J.-B. Le Cam, F. Canévet, I. Jeanneau
Chapter 11. The Integrated Digital Image Correlation Technique Applied to Fracture Mechanics: An Improvement on Crack Detection and Localization
Abstract
Digital Image Correlation (DIC) is a well-known experimental technique allowing for the identification of 2D and 3D displacement fields. iDIC (Integrated DIC) is one of its most successful applications: differently from standard DIC, it uses shape functions that are proper of a specific problem, thus allowing for direct solution of inverse problems.
Fracture mechanics is one of the fields in which the iDIC technique has been widely used. To this aim, the terms of Williams’ series are used as shape functions, thus allowing for the direct identification of KI, KII, and σT. However, proper estimation of fracture mechanics parameters requires identifying the crack tip location and its orientation. Usually, these parameters are defined a priori by the user. The authors propose an enhanced approach based on a hierarchical minimization capable of identifying the crack tip location and of estimating the crack axis orientation.
The analysis is performed first on synthetic images to ensure the reliability of the algorithms and then on real data acquired during high-cycle fatigue test. To allow for in-process acquisition, an adaptive acquisition system is developed able to modify the sampling rate during the life test based on the damage evolution.
Antonio Baldi, Pietro Maria Santucci, Gianluca Marongiu
Chapter 12. Fatigue of Layered Jamming Materials
Abstract
There is increasing interest in creating materials by design, like layered jamming materials, that offer enhanced or novel performance, such as the ability to vary properties in situ (i.e., programmable). Many of these materials rely on microstructural characteristics consisting of interfaces, material distributions, and geometric complexity that provide complex stress distributions that result in the desired properties. It has become increasingly apparent that these materials are exhibiting fatigue behavior that has not been observed in conventional materials. In this research effort, we describe efforts to characterize and model fatigue in layered jamming materials, where the elastic-plastic behavior is programmed via vacuum pressure. In order to understand the relationship between the interfacial structure and the subsequent fatigue behavior, we utilized low cycle fatigue experiments conducted on cantilever beams with layers composed of three different types of surfaces: (a) laminated paper, (b) sandpaper, and (c) multi-material polymer layers with 3D printed interfacial features. It was postulated that plastic deformation of surface asperities for laminated paper resulted in a slight increase in the load bearing capacity of the beam, as well as the stiffness. For sandpaper, particle interlocking and decohesion resulted in a substantially higher stiffness but a slightly lower load bearing capacity. Specimens consisting of multi-material polymer layers of rubber and hard plastic with spikes on the surface also exhibited reduction in load bearing capacity and higher stiffness but were dominated by the inherent time-dependent behavior of the layers. An elastic-plastic model we had previously developed for layered jamming materials was successfully applied to these materials. The experimental data and model can potentially be utilized by machine learning techniques to further elucidate on the relationship between the microstructure of the interfaces and the evolution of damage to optimize the macroscopic behavior of these materials by design.
Hugh A. Bruck, Namir M. Bruck, Ruben Acevedo, Satyandra K. Gupta
Chapter 13. The Novel “Fracture” Gun at the DEVCOM Army Research Laboratory for Precise, Highly Instrumented Impact Experiments
Abstract
This paper describes the novel “fracture” gun recently built at the US Army Research Laboratory (ARL) to study dynamic deformation and fracture mechanisms under impact loading using high-speed cameras with DIC. This gun combines the precise projectile/target alignment capabilities typical of a plate impact experiment with the ability to observe phenomena over wide spatial and temporal scales. The velocity capabilities and the target tank will be outlined. The target tank is small with large windows, so that cameras can be placed very close to the impact location which allows for small fields of view that are not typically achievable in these experiments. Velocity measurement, triggering, and lighting solutions will be presented. Of special concern are the DIC errors that develop when imaging through a window that distorts due to a vacuum being pulled in the target chamber; these errors have been quantified. There are very few experimental methods to probe fundamental deformation and fracture mechanisms within the ballistic regime, but this gun and the associated instrumentation are a big step toward better understanding these mechanisms.
Christopher S. Meredith, Logan S. Shannahan
Metadaten
Titel
Fracture, Fatigue, Failure and Damage Evolution, Volume 3
herausgegeben von
Allison Beese
Ryan B Berke
Garrett Pataky
Shelby Hutchens
Copyright-Jahr
2023
Electronic ISBN
978-3-031-17467-4
Print ISBN
978-3-031-17466-7
DOI
https://doi.org/10.1007/978-3-031-17467-4

    Marktübersichten

    Die im Laufe eines Jahres in der „adhäsion“ veröffentlichten Marktübersichten helfen Anwendern verschiedenster Branchen, sich einen gezielten Überblick über Lieferantenangebote zu verschaffen.